OPTO COUPLER TESTING
Optocoupler is one type of ICs , It isolates input and output section by using optical technology this feature increase safety of circuit. Optocoupler has many part number , different part number has different output type so before checking it has to use part number to research with datasheet and find input type and output type. How to check Optocoupler it depends on device type inside the ICs. There are many package of Optocoupler , briefly , through hole and SMD. For through hole type such as DIP-6 which has 6 pin DIP-4 which has 4 pin etc.
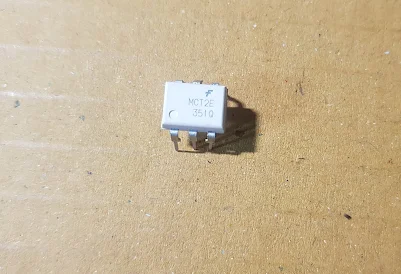
Optocoupler MCT2E DIP-6 Package
I will use MCT2E for example testing. After researching with datasheet we know input is LED
terminal number . 1 is Anode and terminal number 2 is cathode , this case , we will check it by using the same method as LED checking. The dot on ICs body mean that the first pin start from that. The output is a transistor pin number 6 is Base terminal , pin number 5 is Collector terminal and pin number 4 is Emitter terminal , so checking method it has the same method as transistor checking.
Step to test Optocoupler.
1. Input Checking.
2. Output checking.
Good Optocoupler has the good checking results for both input and output checking.
1) Input Checking.
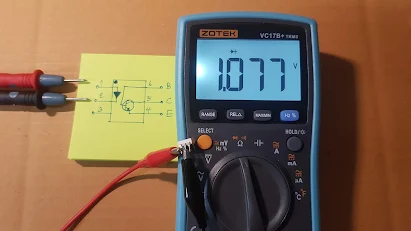
Set the multimeter to diode test Function and connect test leads as photo.
Picture number one is forward biasing to LED so we will see voltage across LED = 1.077V
mean LED is good condtion.
Good LED present voltage drop across when applying forward bias.
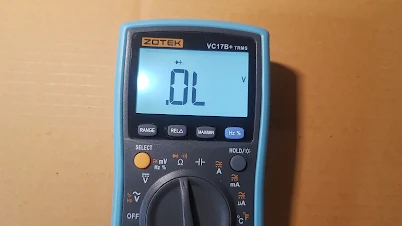
Picture number 2 is reverse biasing to LED so we will see " OL " ( Over Limt) display mean LED is still good.
Good LED present " OL " display when applying reverse bias.
If it is bad LED (short ) the display show around 0.002V as shown below.
and the first and the second testing will get the same results.
Bad LED (short ) the display show around 0.002V 2 time.
If it is bad LED (open ) the display show " OL "
for the first and the second testing will get the same results.
Bad LED (open ) the display show " OL " 2 time
2) Output Checking has 2 step to do ( the same method as transistor checking )
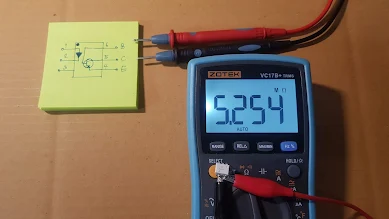
2.1 Check B-C and B-E terminal as shown on photo below , it has 4 times measurement.
- Good transistor output ...when checking B-C and B-E terminal it display high resistance 1 time and " OL" for the second testing.
- Open circuit .....display " OL" for the both measurement.
- Shorted Circuit.....display " 0 ohm " for the both measurement.
- Leak ......display some resistance for both measurement but not the same resistance value.
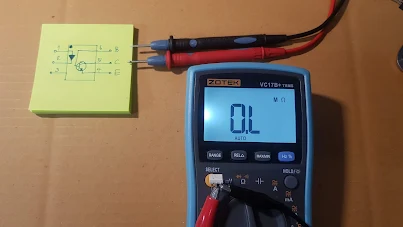
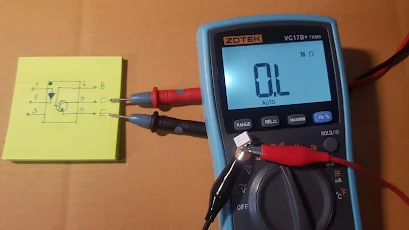
B-E terminal testing show " OL" for the second measurement.
This good B-E terminal.
2.2 Check C-E terminal as shown on photo below , it has to measure 2 times.
Good transistor output when checking C-E terminal ...display " OL" or very high resistance.
for the both measurement ( test and switch test leads )
- Shorted Circuit.....display " 0 ohm " for the both measurement.
- Leak ......display some resistance for both measurement but not the same resistance value.
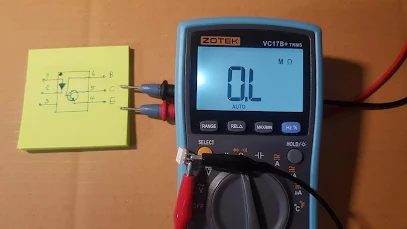
C-E checking , good transistor display " OL" for the first and the second measurement.
If it is bad LED (open ) the display show " OL "
for the first and the second testing will get the same results.
Bad LED (open ) the display show " OL " 2 time
2) Output Checking has 2 step to do ( the same method as transistor checking )
2.1 Check B-C and B-E terminal as shown on photo below , it has 4 times measurement.
- Good transistor output ...when checking B-C and B-E terminal it display high resistance 1 time and " OL" for the second testing.
- Open circuit .....display " OL" for the both measurement.
- Shorted Circuit.....display " 0 ohm " for the both measurement.
- Leak ......display some resistance for both measurement but not the same resistance value.
B-C terminal testing show high resistance value for the fist measurement.
This good B-C terminal .
This good B-C terminal .
B-C terminal testing show " OL" for the second measurement.
This good B-C terminal
This good B-C terminal
B-E terminal testing show high resistance value for the fist measurement.
This good B-E terminal
This good B-E terminal
B-E terminal testing show " OL" for the second measurement.
This good B-E terminal.
2.2 Check C-E terminal as shown on photo below , it has to measure 2 times.
Good transistor output when checking C-E terminal ...display " OL" or very high resistance.
for the both measurement ( test and switch test leads )
- Shorted Circuit.....display " 0 ohm " for the both measurement.
- Leak ......display some resistance for both measurement but not the same resistance value.
C-E checking , good transistor display " OL" for the first and the second measurement.
8 Important Testing electronic device on this blog .
Testing electronic device IGBT testing SCR testing Triac Testing Check mosfet and more
Read on this page.
Read more .... all of testing , list of the article here .
